Everything was working great… and then all the tests broke.
This is the story of how adding a single feature into an app can break all of your tests. And the lessons can be learned from it.
The Feature that Introduced the Chaos
We are working on a Drupal site that makes uses of a multisite approach. In this case, it means that different domains are pointed at the same web server and the site reacts differently depending on which domain you are referencing.
We have a lot of features covered by automatic tests in Webdriver IO – an end to end framework to tests things using a real browser. Everything was working great, but then we added a new feature: a content moderation system defined by the workflow module recently introduced in Drupal 8.
The Problem
When you add the Workflow Module to a site – depending on the configuration you choose – each node is no longer published by default until a moderator decides to publish it.
So as you can imagine, all of the tests that were expecting to see a node published after clicking the save button stopped working.
A Hacky Fix
To fix the failing test using Webdriver you could:
- Login as a user A.
- Fill in all the fields on your form.
- Submit the node form.
- Logout as user A.
- Login as user B.
- Visit the node page.
- Publish the node.
- Logout as user B.
- Login back as user A.
- And make the final assertions.
Here’s a simpler way to fix the failing test:
You maintain your current test that fills the node form and save it. Then, before you try to check if the result is published, you open another browser, login with a user that can publish the node, and then with the previous browser continue the rest of the test.
Multiremote Approach
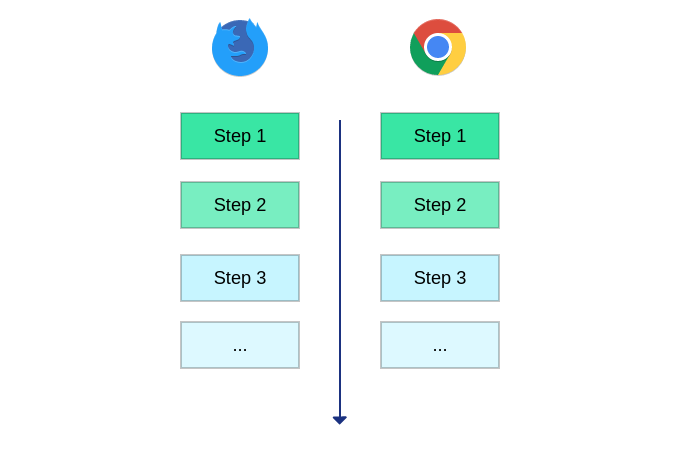
To achieve this, Webdriver IO has a special mode called multiremote:
WebdriverIO allows you to run multiple Selenium sessions in a single test. This becomes handy when you need to test application features where multiple users are required (e.g. chat or WebRTC applications). Instead of creating a couple of remote instances where you need to execute common commands like init or url on each of those instances, you can simply create a multiremote instance and control all browser at the same time.
The first thing you need to do is change the configuration of your wdio.conf.js
to use multiple browsers.
export.config = {
    // ...
    capabilities: {
        myChromeBrowser: {
            desiredCapabilities: {
                browserName: 'chrome'
            }
        },
        myFirefoxBrowser: {
            desiredCapabilities: {
                browserName: 'firefox'
            }
        }
    }
    // ...
};
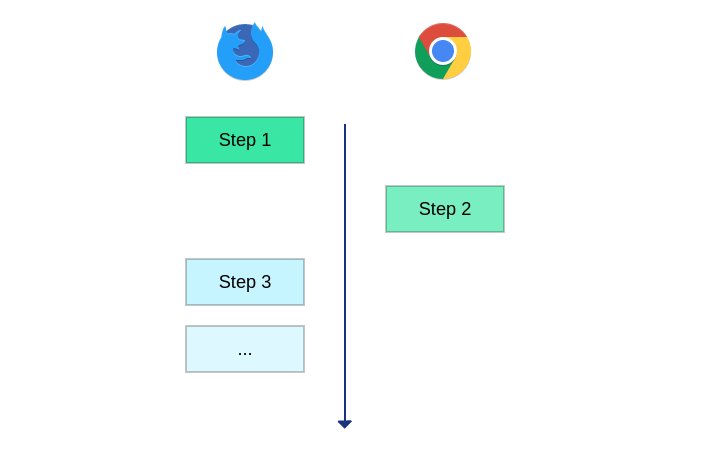
With this config, every time you use the variable browser it will repeat the
actions on each browser.
So, for example, this test:
    var assert = require('assert');

    describe('create article', function() {
        it('should be possible to create articles.', function() {
            browser.login('some user', 'password');

            browser.url('http://example.com/node/add/article')
            browser.setValueSafe('#edit-title-0-value', 'My new article');
            browser.setWysiwygValue('edit-body-0-value', 'My new article body text');

            browser.click('#edit-submit');
            browser.waitForVisible('.node-published');
        });
    });
will be executed multiple times with different browsers.
Instead of using browser you can make use of the keys defined in the capabilities
section of the wdio.conf.js file. Replacing browser with myFirefoxBrowser
will execute the test only in the Firefox instance, allowing you to use the other
browser for other types of actions.
The Custom Command Problem
If you take a deeper look at previous code, you will notice that there are three
special commands that are not part of the WebdriverIO API. login, setValueSafe
and setWysiwygValue are custom commands that we attach to the browser object.
You can see the code of some of those commands in the drupal-elm-starter code.
The problem is – as @amitai realized some time ago – that custom commands don’t play really well with the multiremote approach. A possible solution to keep the custom commands available in all of the browsers is to use some sort of class to wrap the browser object. Something similar to the PageObject pattern.
An example of the code is below:
    class Page {

        constructor(browser = null) {
            this._browser = browser;
        }

        get browser() {
            if (this._browser) {
                return this._browser;
            }
            // Fallback to some browser.
            return myChromeBrowser;
        }

        visit(path) {
            this.browser.url(path);
        }

        setWysiwygValue(field_name, text) {
            this.browser.execute(
                'CKEDITOR.instances["' + field_name + '"].insertText("' + text + '");'
            );
        }

        login(user, password) {
            this.visit('/user/login');
            this.browser.waitForVisible('#user-login-form');
            this.browser.setValue('#edit-name', user);
            this.browser.setValue('#edit-pass', password);
            this.browser.submitForm('#user-login-form');
            this.browser.waitForVisible('body.user-logged-in');
        }

    }

    module.exports = Page;
So now, you have a wrapper class that you can use in your tests. You can create multiple instances of this class to access the different browsers while you are running a test.
    var assert = require('assert');
    var Page = require('../page_objects/page');

    describe('create article', function() {
        it('should be possible to create articles.', function() {
            let chrome = new Page(myChromeBrowser);
            let firefox = new Page(myFirefoxBrowser);

            chrome.login('some user', 'password');
            firefox.login('admin', 'admin');

            chrome.visit('http://example.com/node/add/article')
            chrome.setValueSafe('#edit-title-0-value', 'My new article');
            chrome.setWysiwygValue('edit-body-0-value', 'My new article body text');
            chrome.browser.click('#edit-submit');

            // Here is where the second browser start to work.
            // This clicks the publish button of the workflow module
            firefox.visit('/my-new-article');
            firefox.browser.click('#edit-submit');

            // Once the node was published by another user in another browser
            // you can run the final assertions.
            chrome.browser.waitForVisible('.node-published');
        });
    });
What About Automated Tests?
You may be also wondering, does this work seamlessly for automated tests? And the answer is: yes. We have only tried it using the same browser version in different instances. This means that we trigger several Chrome browser instances that acts as independent browsers.
If you have limitations in how many cores you have available to run tests, it should not limit how many browsers you can spawn. They will just wait their turn when a core becomes available. You can read more on how we configure travis to optimize resources.
As you can see, having multiple browsers available to run tests simplifies their structure. Even if you know that you will not need a multiremote approach at first, it may be a good idea to structure your tests using this browser wrapper, as you don’t know if you will need to refactor all of your tests to run things differently in the future.
This approach also can help to refactor the ideas provided by one of our prior posts. Using JSON API with WebdriverIO Tests so you don’t need to worry about login in with the right user to make the json requests.
